Introduction
This Rice Krispie Treats Recipe is a classic favorite, combining gooey marshmallows and crispy cereal for an irresistible dessert. Perfect for parties, snacks, or a nostalgic treat, this recipe is easy to make and endlessly customizable. Follow along to discover step-by-step instructions, fun variations, and expert tips for the ultimate Rice Krispie Treats Recipe.
What Are Rice Krispie Treats?
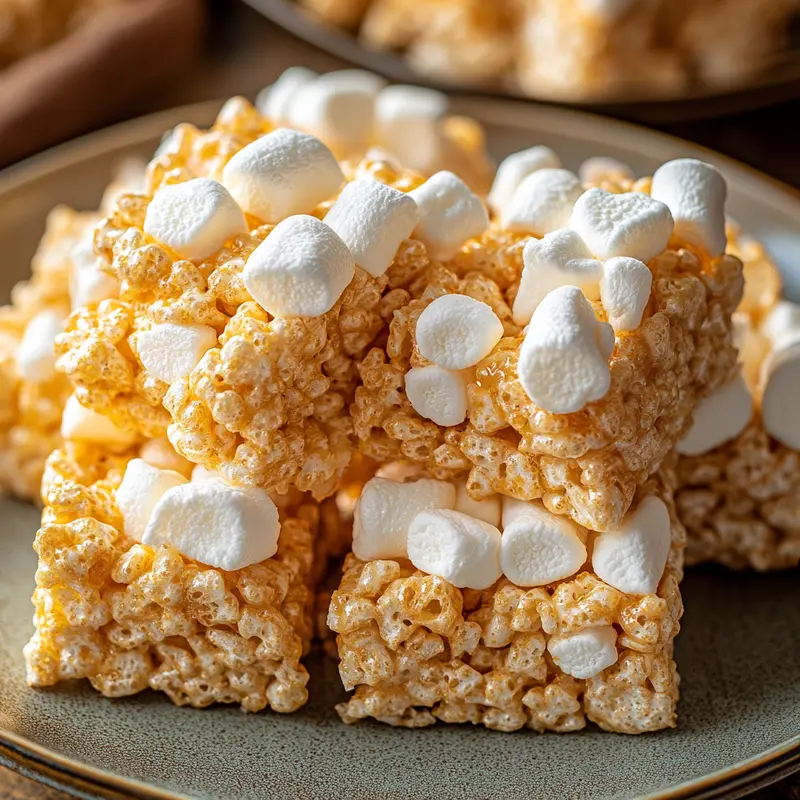
A Rice Krispie Treats Recipe is a simple no-bake dessert made with crispy rice cereal, melted marshmallows, and butter. Originating as a promotional idea by Kellogg’s, this recipe has become a timeless classic loved for its chewy, crunchy texture. Today, a Rice Krispie Treats Recipe is a go-to option for quick, fun desserts that appeal to all ages.
For more nostalgic dessert ideas, check out our guide to classic American cookie recipes
Ingredients Needed for Rice Krispie Treats
The success of any Rice Krispie Treats Recipe starts with the right ingredients. Here are the essentials and some optional add-ins for a creative twist:
Core Ingredients
- Rice Krispies Cereal: A must-have for any Rice Krispie Treats Recipe, providing the signature crunch.
- Marshmallows: The glue that holds this Rice Krispie Treats Recipe together, ensuring gooey perfection.
- Butter: Adds richness and helps the marshmallows melt smoothly in your Rice Krispie Treats Recipe.
Explore more recipes featuring marshmallows, like our s’mores-inspired desserts
Equipment and Preparation Tips
While Rice Krispie Treats require minimal equipment, having the right tools and knowing a few tricks can make the process smoother and the results more consistent. Here’s what you need and some expert tips for success.
Essential Tools
- Large Pot: Use a heavy-bottomed pot to melt the butter and marshmallows evenly without burning.
- Wooden Spoon or Silicone Spatula: These are ideal for stirring the sticky marshmallow mixture.
- Baking Dish or Pan: A 9×13-inch pan is standard for this recipe, but smaller pans can be used for thicker treats.
- Wax Paper or Parchment Paper: Line your pan to prevent sticking and make cleanup easier.
- Non-Stick Cooking Spray: Lightly spray your utensils and hands to handle the sticky mixture more easily.
Preparation Tips
- Low and Slow: Melt the butter and marshmallows over low heat to avoid scorching and to maintain the perfect gooey texture.
- Don’t Press Too Firmly: When transferring the mixture to the pan, press gently to avoid compressing the treats, which can make them too dense.
- Work Quickly: Once the marshmallow mixture is ready, mix in the cereal quickly to ensure even coating before it cools and sets.
- Level the Surface: Use a spatula or the back of a spoon to evenly distribute and flatten the mixture in the pan.
Following these tips ensures that your Rice Krispie Treats will have the ideal balance of gooey marshmallow and crunchy cereal with a professional finish.
Step-by-Step Instructions
Making Rice Krispie Treats is straightforward, but following these detailed instructions will help you achieve perfect results every time. Let’s dive into the process, from start to finish.

Step 1: Gather Your Ingredients and Equipment
Start by measuring out all your ingredients and preparing your tools. Have the Rice Krispies cereal ready in a large bowl and ensure your marshmallows and butter are within easy reach. Line your baking dish with parchment or wax paper and lightly coat it with non-stick cooking spray.
Step 2: Melt the Butter
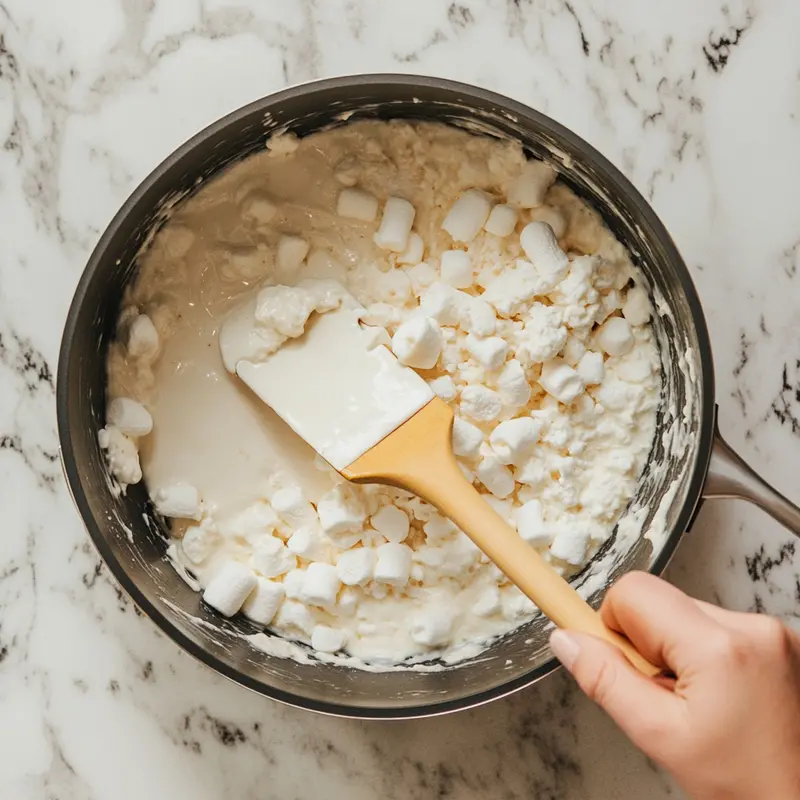
Place your heavy-bottomed pot over low heat and add the butter. Stir occasionally as it melts to prevent it from browning or burning. Once the butter is fully melted, you’re ready for the next step.
Step 3: Add and Melt the Marshmallows
Add the marshmallows to the melted butter, stirring continuously with a wooden spoon or silicone spatula. Keep the heat low to ensure the marshmallows melt evenly without scorching. For an added flavor boost, you can stir in a teaspoon of vanilla extract at this stage.
Step 4: Combine the Cereal and Marshmallow Mixture
Once the marshmallows are completely melted and smooth, remove the pot from the heat. Quickly pour the Rice Krispies cereal into the pot, stirring vigorously to coat each piece of cereal evenly. Work efficiently, as the mixture will start to set as it cools.
Step 5: Transfer to the Pan
Pour the cereal mixture into your prepared baking dish. Lightly spray your hands or a spatula with non-stick cooking spray and gently press the mixture into the pan. Avoid pressing too hard, as this can make the treats overly dense.
Step 6: Let the Treats Set
Allow the Rice Krispie Treats to cool and set at room temperature for about 30 minutes. Once they’re firm enough, lift them out of the pan using the parchment or wax paper and transfer them to a cutting board.
Step 7: Cut and Serve
Use a sharp knife to cut the treats into squares or rectangles. For a creative twist, use cookie cutters to make fun shapes. Serve immediately or store for later enjoyment.
Common Mistakes to Avoid
- Overheating the Marshmallows: High heat can cause the marshmallows to become hard, resulting in less gooey treats.
- Pressing the Mixture Too Firmly: This can lead to dense, hard treats instead of light and airy ones.
- Not Working Quickly: The marshmallow mixture sets fast, so mix and transfer it promptly.
By following these steps and tips, you’ll create delicious Rice Krispie Treats that are sure to impress your family and friends.
Creative Variations on the Recipe
While the classic Rice Krispie Treats recipe is a crowd-pleaser, adding creative twists can make them even more exciting. Below are some popular variations to try, each offering unique flavors and textures.
1. Chocolate Rice Krispie Treats
For chocolate lovers, this variation is a must-try. Simply add 1/2 cup of cocoa powder to the melted marshmallow mixture or stir in 1 cup of chocolate chips before pressing the mixture into the pan. Alternatively, drizzle melted chocolate over the top for a decorative and indulgent finish.
Pair these chocolate treats with a refreshing drink like our Grinch Punch recipe for a perfect party combo
2. Peanut Butter Rice Krispie Treats
Incorporating peanut butter into the recipe adds a rich, nutty flavor. Stir 1/2 cup of creamy or crunchy peanut butter into the marshmallow mixture after melting the butter and marshmallows. For a more decadent option, top the treats with a layer of melted chocolate.
For more peanut butter-inspired desserts, explore our protein-packed peanut butter brownies
3. Funfetti Rice Krispie Treats
Add a festive flair by mixing 1/4 cup of colorful sprinkles into the cereal before combining it with the marshmallow mixture. These treats are perfect for birthdays, holidays, or any celebration.
4. S’mores Rice Krispie Treats
Bring the campfire experience to your kitchen with this variation. Add 1 cup of crushed graham crackers and 1/2 cup of mini chocolate chips to the Rice Krispies cereal before mixing. For an extra touch, use marshmallow fluff instead of regular marshmallows.
5. Holiday-Themed Treats
Customize your treats for holidays by adding seasonal ingredients or decorations. For example:
- Christmas: Add red and green sprinkles or use white chocolate and crushed candy canes as a topping.
- Halloween: Incorporate candy corn or orange and black sprinkles.
- Valentine’s Day: Add pink and red heart-shaped sprinkles or drizzle white chocolate tinted with red food coloring.
Create a festive holiday spread with our easy crockpot meals for busy celebrations
6. Healthier Variations
If you’re looking for a healthier option, try substituting some ingredients:
- Brown Rice Cereal: Use whole-grain brown rice cereal instead of the traditional version.
- Honey or Maple Syrup: Replace marshmallows with honey or maple syrup for a natural sweetener.
- Nut Butters: Incorporate almond butter or cashew butter instead of peanut butter for a gourmet twist.
For more wholesome dessert ideas, check out our guide to healthy, guilt-free snacks
Tips for Success with Variations
- Balance the Flavors: Ensure the added ingredients don’t overpower the marshmallow and cereal base.
- Adjust the Texture: Depending on the add-ins, you may need to slightly increase the amount of marshmallows to maintain a cohesive mixture.
- Experiment Boldly: Don’t be afraid to try unconventional combinations like dried fruits, nuts, or flavored syrups.
With these creative variations, your Rice Krispie Treats can go from simple snacks to show-stopping desserts tailored to any occasion or personal preference.
How to Store and Serve Rice Krispie Treats
Proper storage and creative serving ideas can extend the freshness of your Rice Krispie Treats and make them even more enjoyable. Here’s everything you need to know.
Storing for Freshness
Rice Krispie Treats are best enjoyed fresh, but with the right techniques, you can keep them delicious for days:
- Room Temperature: Store the treats in an airtight container at room temperature. They will stay fresh for up to 3 days.
- Refrigeration: For slightly longer storage, place the airtight container in the refrigerator. The treats will remain fresh for about a week, but they may lose some of their softness.
- Freezing: To store for up to 6 weeks, wrap individual squares tightly in plastic wrap, then place them in a freezer-safe bag. When ready to enjoy, let them thaw at room temperature for about 30 minutes.
Tips for Maintaining Freshness
- Avoid Exposure to Air: Air can dry out the treats, so always store them in an airtight container.
- Layering Protection: If stacking treats, place wax or parchment paper between layers to prevent sticking.
- Wrap Immediately: Once the treats are cut, wrap or store them promptly to lock in moisture.
Serving Suggestions
Make your Rice Krispie Treats even more appealing with creative serving ideas:
- Individual Wrapping: Wrap each treat in clear plastic and tie with a ribbon for party favors or grab-and-go snacks.
- Drizzled Toppings: Before serving, drizzle melted chocolate, caramel, or icing over the treats for added flavor and presentation.
- Serve with Dips: Pair the treats with small bowls of melted chocolate, peanut butter, or fruit dips for a fun dessert platter.
- Cut into Shapes: Use cookie cutters to make themed shapes for holidays or special events.
- Layered Desserts: Crumble the treats and layer them in a trifle dish with whipped cream, pudding, or fruits for a unique dessert option.
For tips on repurposing leftovers, explore our creative ways to use leftover ingredients
Occasions to Serve Rice Krispie Treats
These versatile treats are perfect for:
- Parties and Gatherings: Their bite-sized nature makes them ideal for large groups.
- Lunchboxes: A fun and satisfying addition to kids’ lunches.
- Gifting: Pack them in decorative tins or boxes for homemade gift ideas.
- Seasonal Celebrations: Customize the treats for holidays like Christmas, Halloween, or Valentine’s Day.

Whether you’re storing them for later or serving them creatively, Rice Krispie Treats are a surefire way to delight everyone at the table.
FAQs
Here are some frequently asked questions about making, storing, and customizing Rice Krispie Treats, along with expert answers to ensure your treats are always perfect.
1. How long do Rice Krispie Treats stay fresh?
At room temperature, they stay fresh for up to 3 days if stored in an airtight container. For longer storage, refrigerate them for up to a week or freeze them for up to 6 weeks.
2. Can I make Rice Krispie Treats vegan?
Yes! Use vegan marshmallows and substitute the butter with a plant-based alternative like coconut oil or vegan margarine. Be sure to check the cereal for any non-vegan additives.
3. Why are my Rice Krispie Treats hard?
Hard treats are often caused by overheating the marshmallows or pressing the mixture too firmly into the pan. Always melt marshmallows over low heat and press gently when spreading the mixture.
4. Can I use flavored marshmallows?
Absolutely! Flavored marshmallows can add a fun twist to your treats. For example, strawberry marshmallows give a fruity flavor, while chocolate marshmallows add a deeper, richer taste.
5. Can I use other cereals instead of Rice Krispies?
Yes, you can substitute Rice Krispies with other cereals like Cocoa Pebbles, Fruity Pebbles, or even Cheerios for a unique flavor and texture. Be creative and experiment with your favorite cereals!
6. How do I make colorful Rice Krispie Treats?
To make colorful treats, add a few drops of food coloring to the melted marshmallow mixture before mixing in the cereal. You can also layer differently colored mixtures for a rainbow effect.
7. Can I double the recipe?
Yes! If you want to make a larger batch, simply double the ingredients. Use a larger pot and pan to accommodate the increased volume, and work quickly to mix everything evenly.
8. How can I make Rice Krispie Treats softer?
To make softer treats, use a bit more butter and marshmallows than the recipe calls for. This creates a gooier mixture, resulting in softer and chewier treats.
9. Can I add nuts or dried fruit to the recipe?
Definitely! Mix in chopped nuts, dried cranberries, raisins, or other dried fruits with the cereal for added flavor and texture.
10. How do I make them more festive for holidays?
Decorate the treats with colored icing, sprinkles, or edible glitter. You can also shape them into holiday-themed forms using cookie cutters or mold them by hand.
With these answers, you can troubleshoot common issues and explore new ways to enjoy Rice Krispie Treats. Happy cooking!

Rice Krispie Treats
Equipment
- Large Pot
- Wooden Spoon or Silicone Spatula
- 9x13-inch Baking Dish
- Parchment Paper
- Non-Stick Cooking Spray
Ingredients
Core Ingredients
- 6 cups Rice Krispies cereal
- 4 cups mini marshmallows
- 3 tbsp butter
Optional Add-Ins
- 1 tsp vanilla extract
- 1/2 cup chocolate chips
Instructions
- Gather your ingredients and prepare your baking dish with parchment paper and non-stick spray.
- Melt the butter in a large pot over low heat.
- Add the marshmallows to the melted butter, stirring continuously until smooth. Stir in vanilla extract if using.
- Remove from heat and quickly mix in the Rice Krispies cereal until evenly coated.
- Press the mixture into the prepared baking dish using a spatula or oiled hands. Avoid pressing too firmly.
- Let the treats set at room temperature for 15–20 minutes before cutting into squares.

